Wednesday, June 25, 2025

Slow Cooker Sausage w/ Peppers & Rice – The Set-It-and-Forget-It Hero

Slow Cooker Sausage w/ Peppers & Rice – The Set-It-and-Forget-It Hero


Look, not every day is meant for sauté pans and standing around. Some days just... need a slow cooker. Like that rainy Thursday when everything felt one sock short of okay. Opened the fridge. Sausages. Bell peppers. A wild idea. Tossed it all in the slow cooker with some rice and hoped for the best.

Turned out better than good. Like, eat-it-straight-from-the-crock good.

Ingredients You’ll Need (loose and forgiving):
  • 1 lb sausage (Italian, smoked, spicy—go wild)
  • 2 bell peppers, sliced (red and yellow for the drama)
  • 1 onion, sliced
  • 1 can diced tomatoes (14.5 oz, with juice)
  • 1 tsp garlic powder
  • 1/2 tsp paprika
  • Salt & pepper
  • 1 cup uncooked long grain rice (not instant. please.)
  • 1 3/4 cups chicken broth
  • Olive oil (just a lil drizzle for flavor)
  • Optional: red pepper flakes if you like to live loud.
The Game Plan

First—slicing time. Chop those sausages into thick chunks. Peppers and onion too. Nothing fussy. It’s all going into the same pot anyway.

Now grab that slow cooker. Drizzle in a little olive oil. Toss in the sausage, peppers, onions. Add the diced tomatoes, spices, and a sprinkle of salt and pepper. Mix it? Maybe. Or just layer it up. Either way works. It’s a slow cooker, not a science lab.

Now—the rice and broth. Add them in last, stir gently if you're nervous about rice sticking. But honestly? It'll figure itself out.

Lid goes on. Set to low for 5-6 hours. Or high for 2.5–3. Walk away. Let it cook. Forget it until the smell punches you in the face with comfort.

Serve It Hot. Maybe Extra Hot.

Once done, give everything a good stir. Sausage? Tender. Rice? Fluffy, soaked in tomato-pepper goodness. Peppers? Soft with a slight bite. It’s all just... right.

Spoon into bowls. Maybe add a little grated cheese. A spoonful of sour cream if that’s your mood. Hot sauce too, if the day calls for it. Crusty bread on the side? Yeah, do that.

Next-Day Power Move:

This stuff is even better the next day. More flavor, more cozy. Reheat and eat like you planned the whole thing.

This dish? It’s a weeknight win. A throw-it-in, walk-away, feed-everyone kind of meal. Comfort food without the fuss. No apron. No precision. Just slow, steady flavor.

And zero regrets.

Labels:

Slow Cooker Burrito Bowls – A Lazy Legend in a Bowl

Slow Cooker Burrito Bowls – A Lazy Legend in a Bowl


It started with zero motivation. A grey Tuesday. Work piling. Hunger rising. The kind of day where the oven felt like an enemy and standing by the stove? Out of the question. Enter: slow cooker. Bless this glorious machine. Toss stuff in, walk away, come back to something magical. That’s how these burrito bowls were born.

Hearty. Warm. Zero stress. Let’s go.

What You’ll Need (throw it in, no rules police here):
  • 2 boneless chicken breasts (or thighs, if you like things juicy)
  • 1 cup uncooked rice (white, brown—whatever you vibe with)
  • 1 can black beans, drained
  • 1 cup corn (frozen, canned, who cares)
  • 1 can diced tomatoes with green chiles (the spicy whisper you didn’t expect)
  • 1 1/2 cups chicken broth
  • 1 packet taco seasoning (or DIY it if you’re feeling chef-y)
  • 1/2 tsp cumin
  • Salt & pepper 
  • Optional toppings: shredded cheese, avocado, sour cream, salsa, crushed tortilla chips, lime wedges (add what your soul says yes to)
The Chaos Method

So here’s the move. Grab your slow cooker. Dump in the chicken. Add rice. Beans. Corn. Tomatoes. Everything goes in. Don’t overthink it. Sprinkle in the taco seasoning, cumin, some salt and pepper. Pour in the broth last—just enough to let the rice cook and not go dry.

Give it a stir, maybe once. Or don’t. It works either way.

Lid on. Set to low for 6-7 hours. Or high for 3-4. That’s it. Seriously. Walk away. Let life happen. Do your thing. Nap. Work. Chase toddlers. When you come back, the smell? It’s burrito bowl heaven.

Shred, Stir, Serve

When time’s up, open the lid (slow cooker fog hits you like a tortilla-scented dream). Chicken? Fork-tender. Shred it right in the pot. It just falls apart—like that one friendship in college. Stir everything together. Fluff the rice a bit. Done.

Scoop into bowls. Top with whatever you’ve got—cheese, sour cream, avocado chunks, jalapeños if you like pain. Squeeze of lime if you’re fancy. Or just eat it plain and hot. Still wins.

Leftovers? Better the Next Day

Pack it for lunch. Eat it cold if you’re weird like that. Or reheat with more cheese melted in and pretend you planned it all along.

Slow cooker burrito bowls—proof you don’t have to try hard to eat like a legend. It’s a dump-and-done dinner that’ll feed a crowd or just you, three times. Trust me, this one sticks around.

Labels:

Chicken Zucchini & Parmesan – The Crispy-Soft Combo You Didn’t Know You Needed

Chicken Zucchini & Parmesan – The Crispy-Soft Combo You Didn’t Know You Needed


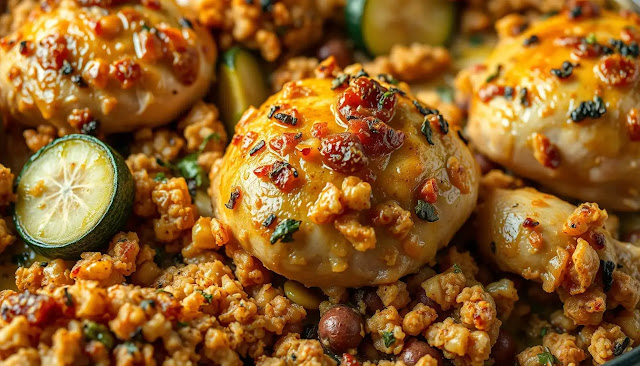
This started on a Wednesday. You know, that kind of Wednesday—neither good nor bad, just… there. Opened the fridge. Half a zucchini. One lonely chicken breast. A sad block of Parmesan. Not much. But the kitchen whispered, “Make it work.” And hey—we did. And it turned into something golden. Let’s dive in.

Ingredients You’ll Need (no need to measure with lab precision):
  • 2 medium zucchinis, sliced into thick rounds (not paper-thin, we want bite)
  • 2 boneless chicken breasts, cut into chunks or strips
  • 1/2 cup grated Parmesan cheese (the real stuff makes it sing)
  • 1/4 cup breadcrumbs (optional, but adds crunch—your call)
  • 2 garlic cloves, minced
  • Olive oil – a few tablespoons
  • Salt & pepper, obviously
  • Dried oregano or Italian seasoning – just a sprinkle
  • Fresh parsley or basil for garnish (if you're feeling cute)
Here’s What Happened

First, heated up a large skillet. Olive oil, splash. Wait till it’s shimmering. Toss in the chicken. Sizzle. Salt, pepper, garlic, and a pinch of that dried oregano. Stir it around, let it brown a bit. 5-7 minutes-ish until it’s no longer pink. Don’t rush. Let it get some color.

Then—add the zucchini slices. Right into the same skillet. Things get real cozy here. Cook those for about 4-5 minutes. Stir gently. Zucchini's tricky—too much heat and boom, mush. We want soft, but not soggy. That perfect bend. You’ll know.

Parmesan Magic Happens

Here comes the flavor blanket. Sprinkle the grated Parmesan over everything. Toss. Maybe a little more. Go wild. If you're using breadcrumbs, now’s the time to add 'em. Toast it all together for 2-3 minutes. Everything sticks. Everything crisps. Kinda smells like someone knows how to cook. Surprise—it’s you.

That cheese starts to melt into the chicken. Zucchini gets kissed by golden bits. Garlic hanging around like background music.

Plate & Chill

Scoop it all onto a plate. Or bowl. Or eat straight from the skillet (we don’t judge). Sprinkle chopped parsley or basil if you’ve got it. Serve with a chunk of crusty bread, or nothing. It kinda holds its own.

So go ahead. Make it once, then again next week. It sticks with you.

Labels:

How to Make Chicken & Rice Burritos – A Wrap Full of Cozy Chaos

How to Make Chicken & Rice Burritos – A Wrap Full of Cozy Chaos


So there we were. Sunday night. Hungry. Too lazy for anything fancy, but still craving something warm and wrapped and cheesy. Burritos? Yup, chicken & rice burritos. That’s the move. Fast forward—kitchen’s a mess, the smell of sizzling chicken in the air, and tortillas getting warmed like fluffy blankets. Let me walk you through this edible magic. It's easy. A bit messy. But oh, worth every fold.

What You’ll Need (don’t stress, it’s flexible):
  • 2 cups cooked rice (leftover rice works best—less sticky drama)
  • 2 cups shredded cooked chicken (rotisserie? yes. grilled? perfect.)
  • 1 can black beans, drained
  • 1 cup corn (frozen, canned, or fresh sliced off the cob—whatever you got)
  • 1 cup shredded cheddar or a Mexican blend (cheese makes it loveable)
  • 1/2 cup salsa (add more if you live spicy)
  • 1 tsp cumin
  • 1/2 tsp paprika
  • Salt and pepper, duh
  • 6–8 large flour tortillas (warm ‘em a little—trust me)
  • Sour cream, guac, or hot sauce to serve (optional but not really)
The Burrito Ballet Begins

Okay, step one. Heat up a large skillet. Medium heat. Toss in your shredded chicken, add the cumin, paprika, and a little salt and pepper. Stir it up—about 3-4 minutes. Let those spices hug the meat. You’ll smell when it’s right. Feels cozy. Like Sunday.

Then throw in the rice, beans, corn, and salsa. Stir. Mix. Make it a burrito party in that pan. Heat everything through. If the mixture feels dry? Add a splash of water or more salsa. No stress. Top it off with cheese and let it melt into gooey perfection.

Now comes the fold part.

Tortilla Time

Lay out a warm tortilla. Spoon in some of the filling right in the center. Not too much though, or boom—burrito explosion. Fold in the sides, roll from the bottom, and tuck it tight. Like you're wrapping a soft edible gift. Repeat until you run out of filling or tortillas. Or both.

You could stop here. But nah—go one more step. Place each burrito seam-side down on a hot dry pan or skillet. Toast for 1-2 minutes per side. Boom—crispy outside. Melty, warm inside. That’s the bite.

Serve & Sink In

Plate ‘em. Add a dollop of sour cream or guac. Splash hot sauce if you're brave (or reckless, it’s fine). These burritos don’t need much. They’re handheld happiness.

Leftovers? Wrap 'em in foil. Reheat later. Or eat cold at midnight while standing at the fridge. We won’t judge.

One last note—this recipe bends. Swap chicken for beef, tofu, even scrambled eggs. Add jalapeños if your mouth's into thrillers. Use brown rice, quinoa, or cauliflower rice if you're on that journey.

Just don’t skip the cheese. Or the story. Every burrito tells one.

Enjoy the chaos.

Labels:

Naan Pizzas: The Lazy Crust That Changed Everything

Naan Pizzas: The Lazy Crust That Changed Everything


Pizza night. It hits different when you don’t gotta mess with dough. No rolling, no rising, no flour everywhere. Just naan bread. Yep—store-bought, fluffy, warm naan. Lay it flat, top it wild, bake it quick. Done. That’s the story of Naan Pizzas. And it's a short, beautiful story.

The first time I made one? Total accident. Had leftover tikka masala naan and a handful of cheese. Tossed some stuff on it, threw it in the oven. Came out crispy on the edges, chewy in the middle. A bit chaotic. But delicious. Like... wow.

Ingredients (Your Pizza, Your Rules)

2–4 pieces of naan bread (plain, garlic, or whatever you like)
1 cup pizza sauce (or marinara, or pesto, or no sauce at all, be wild)
1½ cups shredded mozzarella cheese
1 tsp olive oil (optional, for that crispy edge glow-up)

Toppings of your dreams

Pepperoni
Cooked chicken
Bell peppers
Mushrooms
Red onion
Black olives
Fresh basil
Crushed red pepper

Literally whatever you find in your fridge

Let the Chaos Begin: How to Make It

Preheat that oven. 425°F (220°C) is the sweet spot. Hot enough for crispy, not too hot to burn your dreams.

Line a baking sheet. Or don’t. But be warned: cheese will ooze. Lay your naan flat. Drizzle with a bit of olive oil if you’re feeling fancy. Then sauce it up. Thin layer. Don’t drown it.

Cheese next. As much or as little as you want. More is more, but hey—your call.

Now toppings. Be creative. Clean-out-the-fridge style. Leftover grilled veggies? Go for it. Last night's chicken curry bits? Heck yes. Just balance the flavors. Kinda.

Pop the tray in the oven. Bake for 10–12 minutes. Edges should look golden. Cheese bubbling. You’ll know.

Pull it out. Let it sit. Just a bit. It’s lava right now. Then slice it up. Or fold it like a taco. Or eat it whole. No one's judging here.

Why You’ll Keep Coming Back to This

Because it’s stupid easy. Fast. Tasty. No dough stress. And it feels a bit gourmet without trying too hard.

It’s also fun. Make it a DIY pizza bar with friends or kids. Everyone builds their own. Less arguing, more cheese pulling.

Some Quick Notes (a.k.a. mini wisdom)

- Want a crispier base? Bake the naan plain for 3 minutes before topping it.

- No pizza sauce? Use BBQ, hummus, or even ranch. Chaos works.

- Leftovers reheat well in a pan. Just saying.

So yeah. Naan Pizzas—the hero of weeknight dinners, lazy lunches, or midnight cravings.

Fast. Simple. Surprisingly amazing. Try it once, then wonder why you ever messed with dough.

Labels:

Turkey Vegetable Skillet — A One-Pan Wonder That Saves Your Weeknight

Turkey Vegetable Skillet — A One-Pan Wonder That Saves Your Weeknight


You know those nights. You're hungry. Tired. Dishes already piled high from breakfast and who-knows-what else. That’s when the Turkey Vegetable Skillet enters like a hero. One pan. Loads of flavor. Veggie-packed. And still somehow feels like comfort food. Win-win.

This recipe? Came from a lazy Tuesday. Groceries were low. Turkey? Check. Random veggies? Yup. And one lonely onion. Tossed everything in a pan, said a silent prayer—turned out it was the best meal that week. No joke.

Ingredients (A.K.A. What You’ll Be Digging Into)
  • 1 lb ground turkey (lean works best, less greasy mess)
  • 2 tbsp olive oil (or butter if you like a richer vibe)
  • 1 small onion, diced
  • 2 cloves garlic, minced (or more... no judgment)
  • 1 zucchini, chopped
  • 1 bell pepper, any color, chopped
  • 1 cup cherry tomatoes (they burst, it’s magic)
  • 1 cup corn kernels (frozen or canned, both work)
  • 1 tsp paprika
  • ½ tsp dried oregano
  • Salt & black pepper to taste
  • A sprinkle of shredded cheese on top (optional but not really)
Let’s Get Real: The Cook-Up

Heat the olive oil in a big ol’ skillet. Medium heat. Toss in your diced onions. Sizzle. Stir. Once they’re soft and starting to go golden, garlic jumps in. Just for a minute. Smells amazing? You’re on track.

In goes the ground turkey. Break it up with a wooden spoon or whatever’s clean. Let it brown. Don’t rush. Let it get those slightly crispy bits—those are gold.

Now the fun part: add your chopped zucchini, bell pepper, and corn. Stir it up. Let it all mix and mingle. Cook for about 5–7 minutes. You want veggies tender, but not mush. Still got some life.

Throw in the cherry tomatoes last. They’ll soften, maybe burst. Adds a saucy kick. Sprinkle paprika, oregano, salt, and pepper. Stir again. Taste. Adjust seasoning. Done? Almost.

If you’re feeling indulgent (and why not), sprinkle cheese on top. Let it melt right in the pan. Turn off the heat. Let it sit for a few minutes.

Done in a Flash

Scoop it into bowls. Or eat it straight from the skillet. Yeah. Sometimes that’s the vibe.

Why You’ll Make It Again (and Again)

Because it’s easy. It's colorful. It makes you feel like you tried, without actually trying that hard. And bonus—leftovers? Still amazing tomorrow.

Meal prep? Check. Dinner in under 30 minutes? Yup. Just enough veggies to feel healthy? You bet.

A Few Quick Hacks
  • Add spinach at the end if you're feeling leafy.
  • Swap zucchini for mushrooms, or both. Live wild.
  • Throw a fried egg on top. Mind blown.
So. Turkey. Veggies. One pan. No fuss.

What’s not to love?


Labels:

Walking Tacos: The Lazy Genius of Taco Night

Walking Tacos: The Lazy Genius of Taco Night


Let me tell you about one of the best party hacks ever—walking tacos. Sounds weird, I know. But it’s genius. Picture this: all the joy of tacos, none of the plate mess. You just eat it straight out of a chip bag. Yep. A literal bag of chips. No dishes. Kids love it. Adults sneak seconds. Everyone wins.

It started at a tailgate. Hot day. Cooler full of soda. Someone brings out a crate of mini chip bags and a tub of ground beef. “Trust me,” he says. We did. Never looked back.

What You’ll Need (a.k.a. The Chaos Kit)
  • 1 lb ground beef (or turkey if you’re that person)
  • 1 packet taco seasoning (or homemade if you're feeling chef-y)
  • ¾ cup water
  • Individual snack-sized bags of Doritos or Fritos (game changer)
  • Shredded lettuce (handfuls, not science)
  • Shredded cheddar cheese (melty dreams)
  • Diced tomatoes
  • Sour cream
  • Sliced jalapeños (optional... spicy regret?)
  • Salsa or hot sauce
  • Diced onions (optional—trust issues here)
  • Plastic forks. And napkins. Lots.
The Not-So-Fancy Method

Brown the beef. Toss it in a pan, medium heat. No oil needed if it's fatty. Stir like your life depends on it—or don’t, just don’t burn it. Drain the grease. Add the taco seasoning + water. Let it bubble and simmer till thick. Smells amazing? Good. That’s your green light.

While the meat simmers, prep the toppings. Chop. Grate. Spoon. Toss 'em in little bowls or just keep it rustic and let everyone dig in.

Here comes the fun part—grab a chip bag (still sealed), crush the chips gently. Not into dust. Just a little crumble action. Open the bag wide. Real wide. Spoon in the hot taco meat. Add your toppings, your way. Lettuce? Sure. Cheese? Dump it. Sour cream? Dollop. Jalapeños? If you're brave.

Stick a fork in it. And boom—walking taco.

Why People Go Nuts for This

It’s portable. It’s customizable. And honestly, it’s oddly satisfying to eat tacos from a chip bag. There’s something rebellious about it. Like, look Ma, no plates!

Great for camping trips. Birthday parties. Late-night cravings. Quick dinners when everyone’s too tired to care but still wants to feel like they made an effort.

Pro Tips? Fine.
  • Warm the chip bags for 30 seconds in the sun or near heat if you're in cold weather. Slightly warm chips = magic.
  • Add a squeeze of lime if you're fancy like that.
  • Vegetarian? Swap meat with beans. No one’ll notice.
Wrap It Up... or Don’t

Walking tacos. It’s tacos without the rules. Easy. Tasty. Kind of chaotic. But sometimes? That’s exactly the vibe you need.

So next time you're wondering what to make that’s fun, fast, and leaves your sink clean—grab the chips. The taco party starts in the bag.

Labels:

Friday, June 13, 2025

How to Make Italian Pasta Salad (The Way You Actually Want to Eat It)

How to Make Italian Pasta Salad (The Way You Actually Want to Eat It)


It was a lazy Sunday afternoon. Sun poking through the kitchen window. The radio hummed something old. I needed something easy. Quick. Cold. Pasta salad. But not the sad kind you see sweating at the corner of buffet tables. No. A proper Italian Pasta Salad. One that sings.

First things first. Ingredients. Grab these. Trust me, don’t skip.
  • 3 cups cooked rotini pasta (the twisty ones, they hold magic)
  • 1 cup cherry tomatoes, halved. Sweet ones, not sour.
  • 1 cucumber, diced small
  • 1/2 cup black olives, sliced thin. Or whole, if you like surprise bites.
  • 1/2 red onion, finely chopped. Sharp but worth it.
  • 1 cup mozzarella pearls. Or just cube the block. Nobody cares.
  • 1/4 cup sliced pepperoni or salami (optional... but why skip flavor?)
  • 1/4 cup fresh basil leaves, torn by hand. Don’t chop. Tear. Like life.
  • 1/3 cup Italian dressing (bottled is fine... but homemade? even better)
  • Salt and black pepper, as you like.
That’s it. The crew. The band.

Now. The magic part. The mixing.

Boil your rotini until they’re just right—not mushy, not hard. Al dente they call it in the old country. Like biting into a memory. Drain. Rinse under cold water. Important. Don’t skip. Keeps things fresh. Not soggy.

Grab a big bowl. Like, big big. Dump the pasta in. Then the tomatoes. Then the cucumber. Then the onions. Then the olives. Then—yes—the mozzarella. Don’t forget the basil. Never forget the basil. Toss gently. Like folding a secret.

Add the pepperoni if you feel bold. I usually do. Life’s short. Toss again.

Pour the dressing over. All of it. Let it rain. Toss one more time. Taste. Maybe a pinch of salt. Maybe more pepper. Up to you. You’re the boss here.

Let it sit in the fridge. 30 minutes. Maybe an hour. The flavors need to talk. Marry. Whisper secrets. Trust the process.

When you finally eat it—cold, sharp, fresh—it tastes like summer. Like weekends. Like Italy... even if you're just in your kitchen in old sweatpants.

And that’s it. Italian Pasta Salad. Not complicated. No rules. Just real food.

Eat. Smile. Maybe pour some wine.

You earned it.

Labels:

How to Make Zucchini Chicken Stuffing Bake (And Why You’ll Probably Want Seconds)

How to Make Zucchini Chicken Stuffing Bake (And Why You’ll Probably Want Seconds)


You know how some recipes just sneak into your life and stay forever? Like that odd sweater your aunt gave you that somehow works with every outfit. Yeah, this Zucchini Chicken Stuffing Bake is a bit like that. Simple. Cozy. Kinda perfect for busy nights when you don’t know what the heck to cook... or don’t want to think too much.

I first made this on a Tuesday. One of those weird midweek days when the fridge is half-empty and your mood matches it. There was chicken. There was zucchini. And—aha—stuffing mix sitting untouched in the pantry. I thought... why not?

So here’s what you need (more or less, no one’s counting zucchini slices here):

Ingredients:
  • 2 medium zucchinis, sliced thin
  • 2 cups cooked chicken, shredded or chopped (leftover rotisserie chicken is golden)
  • 1 box stuffing mix (yep, the instant kind. Don’t feel bad.)
  • 1/2 cup sour cream
  • 1 can cream of chicken soup (or mushroom—if you feel wild)
  • 1/2 cup shredded mozzarella cheese (or cheddar... or whatever’s lurking in the fridge)
  • Salt & pepper
  • 1 small onion, diced (optional but nice)
  • Butter (about 3 tablespoons)
I didn’t really measure the first time. Just threw things together like some chaotic kitchen wizard. But the result? Magic.

Here’s what happened:

First—zucchini. Slice 'em up thin. Not paper thin... unless you wanna feel fancy. Toss them into a greased baking dish, sprinkle a bit of salt and pepper. Not too much. They’re humble things.

Next... the chicken. Leftover roast works wonders here. Or any cooked chicken that didn’t wow you the first time. Toss that over the zucchini like you meant to plan this meal all along.

Then—the creamy glue. In a bowl, mix that can of soup with sour cream and onions if you're using them. A pinch more pepper. Maybe garlic powder? No rules. Pour that glorious mess over the chicken layer.

Now the stuffing. Prepare it according to the box... sorta. Melt butter, stir it into the dry mix with hot water. But don’t make it soupy. You want fluffy, chunky stuffing. Plop it over the creamy chicken mound like you don’t care. But you do care. Deep down.

Lastly—cheese. Sprinkle it with joy. Or desperation. Whatever the mood. I used mozzarella 'cause it was sitting lonely in the fridge.

Into the oven it goes. 350°F (175°C). About 30 minutes. The top turns golden. The cheese melts. You smell cozy fall evenings even if it's June.

And when it comes out? Oof. Crispy stuffing top. Creamy middle. Zucchini all soft and hiding under the layers like forgotten treasure.

I served it straight from the dish. No garnish. No shame. It was gone fast. Maybe too fast.

Try it sometime. When the fridge feels empty but surprises you. When you want something easy. When you need to feel like a kitchen genius without working for it.

You’ll probably want seconds. Maybe thirds.

Labels:

How to Make Lemon Chicken Orzo (And Why You’ll Probably Make It Again Next Week)

How to Make Lemon Chicken Orzo (And Why You’ll Probably Make It Again Next Week)


You ever crave something light, cozy, and just bright enough to feel like summer—even if it’s raining sideways outside? Yeah. Lemon Chicken Orzo does that. It sneaks in like a quiet favorite you didn’t know you needed until your fork hits the plate.

First time I made it, I messed up the orzo. Totally overcooked. Mushy. But even then—it tasted so good I finished it anyway. No shame. But here’s how to do it right.

You’ll Need:

(Not a mile-long list. Promise.)
  • 2 boneless, skinless chicken breasts (or thighs if you want ‘em juicier)
  • 1 cup orzo pasta
  • 3 cups chicken broth (the good kind, homemade if you can but store-bought works, no judgment)
  • 2 cloves garlic, minced real fine
  • 1 small onion, chopped (don’t skip this, seriously)
  • 1 lemon (zested and juiced)
  • 2 tablespoons olive oil
  • 1/4 cup grated Parmesan (optional—but like...is cheese ever really optional?)
  • Salt & pepper
  • Fresh parsley for that pretty green finish
So here’s the scene:

Pan hot. Like medium heat—not burn-your-hand-off hot. Drizzle in olive oil. Sizzle. Chicken breasts (salted and peppered both sides) go in. Let ‘em sear until golden. Like...crispy edges golden. About 5-6 minutes per side depending on thickness. Don’t poke them. Leave them alone.

When they’re done—pull ‘em out. Rest them. Let the juices settle. They deserve it.

Same pan—don’t you dare clean it—toss in the onions. Soft and translucent is the goal. Then garlic. Only for 30 seconds or so. Garlic burns fast and it’ll ruin everything. Trust me.

Now the orzo. Dump it in. Stir it round with the onions and garlic so it soaks up that chicken flavor stuck to the bottom. All the good bits. All of them.

Pour in the broth. Bubbling, cozy broth. Stir. Lower the heat. Lid on. Simmer for about 8-10 minutes. Check once or twice to make sure the orzo’s not sticking. Add a splash more broth if it looks thirsty.

Meanwhile—slice the rested chicken. Juicy and perfect. You’ll want to sneak a piece. Everyone does.

Once the orzo’s creamy (but not mush)—add lemon juice and zest. Stir. Taste. Salt? Pepper? More lemon? You tell me.

Finally...the chicken goes back in. Maybe some Parmesan if you’re feeling dangerous. Fresh parsley showered on top like a tiny forest. Done.

Serve it up.

Bright. Warm. Like the kind of meal you’d make for a lazy Sunday or to impress that friend who claims they don’t like pasta. They’re wrong, by the way.

Leftovers? Good luck with that. There probably won’t be any.

Labels:

Wednesday, June 11, 2025

The Easiest Way to Make Churros (And Why You Should Right Now)

The Easiest Way to Make Churros (And Why You Should Right Now)


So last weekend, stuck at home and craving something crispy-sweet (you know the mood), I decided to make churros. Yes. Churros. Those golden, sugary sticks of joy. And listen... they turned out amazing. Honestly, shockingly good. Like—"where have you been all my life" good. And here’s the best part? Super easy. No weird ingredients. No chef-level skills required.

Let’s dive in.

The Stuff You’ll Need

Keep this short, simple. No fancy nonsense. You probably have all this in your kitchen right now.
  • 1 cup of water
  • 2½ tablespoons sugar
  • ½ teaspoon salt
  • 2 tablespoons vegetable oil
  • 1 cup all-purpose flour
  • Oil for frying (yep, lots)
  • ½ cup sugar (for coating)
  • 1 teaspoon ground cinnamon
  • That’s it. No eggs. No milk. No secret grandma-only ingredients.
Here’s What Went Down

I put the water, sugar, salt, and veggie oil in a little saucepan. Heated it till boiling. Not lava-boiling... just gentle bubbling, you know? Then I yanked it off the heat and dumped in the flour. All at once. Stirred like crazy. It became this thick, weird dough. Sticky but smooth. Kinda like Play-Doh.

Now the fun part. I stuffed the warm dough into a piping bag with a star tip. (If you don’t have one, no problem. Plastic bag with a corner snipped works. Ugly churros are still delicious churros.)

Heated the frying oil till hot—but not angry hot. Like 375°F-ish. Dropped strips of dough into the oil. They sizzled and puffed up like they were coming to life. Magic.

Flipped them around a bit till they were golden and crispy. Took maybe 2–3 minutes. Then—onto a paper towel. Brief rest.

Here’s where they become real churros: Roll those babies in the cinnamon-sugar mix while they’re still warm. Coat 'em good. Like... don’t be shy. They deserve it.

And that’s literally it. Done.

Quick Tips? Sure.

• Don't fry too many at once. Crowding = sad soggy churros.
• Dough too thick? Splash a bit of water in. Too loose? More flour. No stress.
• Eat 'em fresh. Like, NOW. Day-old churros are... sad.

Want chocolate sauce? Melt chocolate chips and a splash of cream in the microwave. Stir. Dip. Die happy.

Why Bother?

Because life is short. And sometimes you just need hot fried dough rolled in sugar to remind you that today isn’t all bad.

Seriously. Make these churros. Like, tonight.

Labels:

Tuesday, June 10, 2025

How to Make Sri Lankan Dried & Fried Jackfruit Strips

How to Make Sri Lankan Dried & Fried Jackfruit Strips


Some things remind you of home. The smell of jackfruit strips frying in coconut oil? Oh, that's definitely one of them. This isn’t some shiny, packaged snack from a supermarket shelf. It’s proper old-school Sri Lankan stuff. Made slow. Made right.

I remember my grandmother sitting on the kitchen floor, a massive jackfruit cracked open beside her like some jungle treasure chest. She’d pull out the golden bulbs carefully—like handling gems. Not a word said. Only the soft "thunk" of the knife as she chopped.

Step One. The Jackfruit.

You need a ripe but firm jackfruit. Not the soft mushy ones for curry. The young ones are best—when the flesh is pale yellow, slightly sticky. Pro tip: rub oil on your hands and knife, or you’ll be peeling glue off your fingers for days.

Cut the jackfruit into manageable pieces. Like thin strips. Not too thick—because they won't dry properly. Not too thin—because they’ll burn. Somewhere in the middle. That sweet spot.
Don’t ask me how thick exactly. You’ll know when you cut it.

Step Two. The Drying.

Here’s where patience comes in. You can’t rush this. Lay the jackfruit strips on a large mat, spread them out. Like drying laundry on a hot village afternoon. Make sure no piece overlaps the other.

Sun-dry for 2 or 3 days. Depends on the weather. If it rains, you're out of luck. Keep them inside till the sky clears. The strips should become leathery, bendy—but dry. Snap one to check. It shouldn’t break. Just bend, like a tired old man stretching his back.

Step Three. The Frying.

The fun part. Heat coconut oil in a deep pan. A lot of oil. You want the strips to swim—not wade—in the oil. Fry them in small batches. Don’t overcrowd. If you dump the whole lot in—bad idea. They’ll stick, clump, burn.

Fry till golden brown. Crisp. Smells incredible. Like the roadside kadé stalls near Colombo bus stands. You’ll know when they’re done.

Fish them out with a slotted spoon. Drain on paper towels. Resist the urge to taste. Well, maybe one. Or two.

Step Four. The Finishing.

Some sprinkle salt. Others—chili powder. Depends how wild you’re feeling. My uncle used to toss his with a pinch of sugar. Said it reminded him of school lunch packets. Strange guy.

And that’s it. Sri Lankan dried & fried jackfruit strips. Crunchy. Sweet. A little smoky from the oil. Perfect with tea. Or sneaked straight from the jar late at night. You know the way.

Funny how a simple fruit can bring back so much.

A Little Note.

Don't store these in the open. They’ll soften in this damn humidity. Glass jar. Tight lid. Or they lose the crunch. And who wants soggy jackfruit strips? No one.

Labels:

How to Make Sri Lankan Karawala Sambol — The Old Way, The Real Way

How to Make Sri Lankan Karawala Sambol — The Old Way, The Real Way


There’s a certain smell that floats from an old Sri Lankan kitchen on a rainy afternoon.
Not curry. Not fresh fish either.
Something sharper. Stronger.
Karawala Sambol.

If you’ve grown up near a coastal town—or let’s be honest—any Lankan household with a decent-sized clay pot, you’d know. The scent of dried fish hitting hot oil is... well. You can’t escape it. You either run outside holding your nose or you pull up a stool to wait with rice steaming in a corner.

What is Karawala Sambol, anyway?

For the unfamiliar, Karawala means dried fish. Thalapath. Mora. Bombili. Thora. Even Katta and tiny white Sprats. Balaya if you're feeling bold. All hard, tough fish made soft by fire and oil. It’s poor man’s curry turned rich man’s delicacy in Colombo cafés these days. Go figure.

Back then, it wasn’t about fashion. It was survival. Salted fish strung on ropes under the sun, crackling in the wind. Gran used to keep a pile wrapped in old newspaper on the kitchen shelf. Next to the chili grinder. Always ready.

How to make it? Easy. But not easy.

First rule.
Get the right fish.

Thalapath is thick and sturdy—good if you like your sambol chewy. Mora flakes easy. Bombili is fatty and soft—grand for frying till crisp. Sprats are small but loud—one handful and the sambol comes alive. Katta Karawala, now that’s sharp and salty, a little wild on the tongue. Balaya? Hmm. Some say too strong. Some swear by it.

Take your pick. Slice or break into small pieces—don't bother making them perfect. Sambol isn’t meant to be fancy.

Next step. Fry.

Heat coconut oil in a small pan. Not olive oil. Never butter. Coconut oil. Wait till it shimmers. Toss the fish in. They will spit and crackle and hiss. Stay back. Let them brown, dark golden. Too long and they go bitter. Too soon and they stay tough.

Drain them. Set aside. Don’t eat yet. Hard, I know. But patience.

Chili time.

Grind fresh red chilies. Or use chili powder if you must. A little roasted chili flakes, if you like the heat creeping slow. Salt. Sliced onions, thin. Green chilies for bite. Some throw in garlic—good choice. Others toss in curry leaves—better choice. Mix everything. Now add the fried fish. Toss, coat, turn till it all sticks together.

Some add a squeeze of lime. Some don’t. Depends on your mood.

Taste. Adjust. More salt? More chili? Up to you. Sambol is personal.

Done.

Serve with hot rice. Maybe dhal curry. Maybe pol sambol on the side. Some fried egg if you feel generous.

And there you have it.

The smell of rain and fire in a plate. The taste of sea and salt and childhood.

Karawala Sambol. Old. Simple. Perfect.

Labels: , , , , , ,